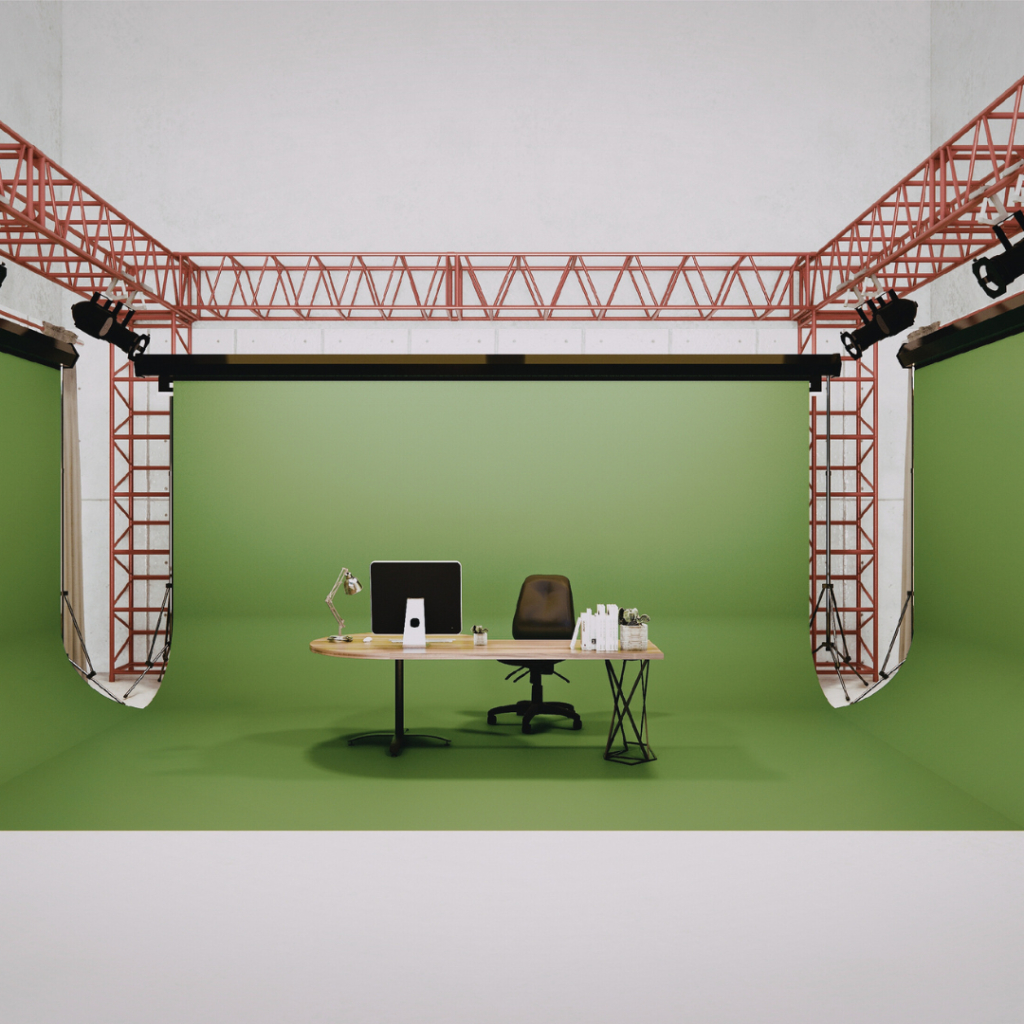
Green screen setups are essential tools for creators looking to expand their content possibilities. The best green screen setup balances quality, affordability, and ease of use, including a wrinkle-free backdrop, proper lighting, and a reliable camera.
Choosing the right components can drastically improve video production value without breaking the budget. This guide covers proven green screen setups tailored for creators of all levels, from beginners to professionals.
Understanding Green Screen Technology
Green screen technology relies on a specific type of background and software to replace colours in a video or image. It requires precise lighting and setup to achieve clean effects without unwanted shadows or spill. Key terms and advantages clarify how creators use this tool effectively.
How Green Screens Work
Green screens use a solid bright green background, which is chosen because it contrasts well with most skin tones and clothing. Video editing software identifies this green colour and replaces it with a digital background or scene, a process called chroma keying.
Proper lighting is essential to avoid shadows and colour spills that can interfere with the clean removal of the green background. The end goal is a smooth transition between the subject and the new visual layer, which can be anything from a static image to a complex 3D scene.
Key Terminology
- Chroma Keying: The digital process of removing a specific colour (usually green) from footage.
- Spill: Unwanted green light reflecting onto the subject, causing colour distortions.
- Backdrop: The physical green screen material or surface used as the background.
- Matte: The alpha channel created in editing that defines transparent and opaque areas.
- Keying Software: Programs like Adobe Premiere Pro or OBS are used to isolate and remove the green colour.
Understanding these terms is vital for troubleshooting issues and optimising green screen use.
Benefits for Content Creators
Green screens allow creators to film in any environment without leaving their studio. This flexibility reduces production costs and setup time. Creators can switch backgrounds instantly to suit different themes or branding.
It also enhances storytelling by enabling effects that are impossible or expensive to shoot live. For example, virtual sets or dynamic scenes are easier to manage. Overall, green screens expand creative possibilities and improve production efficiency.
Essential Equipment for Green Screen Setups
Building a quality green screen setup depends largely on the material chosen, proper lighting, and the camera equipment used. Each component plays a crucial role in ensuring a clean key and professional output.
Choosing the Right Green Screen Material
The choice of green screen material affects how smoothly you can key out the background. Professional-grade fabric like muslin or polyester is preferred. These materials are wrinkle-resistant and provide an even colour surface, reducing shadows and hotspots.
Vinyl screens offer a smooth, reflective surface but can cause glare if not lit properly. Steel frames or clamps are useful to keep the screen taut. Avoid cheap, thin fabrics as they often wrinkle or allow light bleeding, complicating post-production.
The screen size must match your shooting requirements. A minimum width of 6 feet is ideal for individual creators, while larger setups benefit from 9×12 feet or more, allowing greater subject movement.
Lighting Equipment Basics
Even diffuse lighting is essential to avoid shadows and colour inconsistencies on the green screen. Use softbox lights or LED panels with adjustable brightness and colour temperature. Position lights on both sides of the screen at 45-degree angles to minimise shadows.
Separate your subject’s lighting from the green screen’s backlighting to avoid green spill on skin or clothing. A three-point lighting setup for the subject improves keying by adding dimension and separating them from the background.
Consider using flags or barn doors to control light spill. Reflectors can fill shadows, but ensure they do not affect the green screen illumination.
Camera and Lens Recommendations
Cameras with manual settings are essential for consistent exposure and white balance. DSLRs and mirrorless cameras offer the control needed for optimal green screen capture. Avoid auto settings as they may adjust exposure mid-shoot, causing colour shifts.
Shoot in the highest resolution your camera allows to improve keying precision. Use a prime lens in the 35mm to 50mm range to reduce distortion, which can complicate background replacement.
Set your aperture to f/5.6 or higher for adequate depth of field so that subjects and background remain in focus. Lock your focus to prevent autofocus hunting during recording.
| Camera Aspect | Recommendation |
| Resolution | 1080p minimum; 4K preferred |
| Lens Type | Prime, 35-50mm |
| Aperture | f/5.6 to f/8 |
| Exposure Mode | Manual |
| White Balance | Manual setting tuned to lighting |
Top Green Screen Setups for Different Creator Needs
Choosing the right green screen setup depends on space, budget, and workflow. Some creators prioritise compactness and simplicity, while others need high-quality materials and lighting for professional results. The following options balance these priorities clearly.
Home Studio Solutions
For fixed setups, an 8×10 ft green screen fabric or collapsible backdrop works well in small rooms. Fabric screens with wrinkle-resistant polyester maintain a smooth keying surface. Mounting options like wall hooks or freestanding frames save floor space.
Adequate lighting is essential. Softbox kits or LED panel lights with dimmers provide consistent illumination and reduce shadows. Using a key light at 45 degrees and separate background lights ensures even colour.
Add a mid-range camera with manual focus for better control. Common choices include mirrorless models like the Sony Alpha or Canon EOS series. This setup maximises quality without requiring complex gear or a large area.
Portable Green Screen Options
Creators who travel or film in varying locations benefit from pop-up green screens. These fold into compact, lightweight carry cases and pop open in seconds. The semi-rigid frame holds the fabric taut to avoid wrinkles.
Materials are usually polyester with a green dye, optimised for chroma keying. Some models come with reversible fabric, doubling as blue screen options.
Portable LED light panels powered by USB or rechargeable batteries complement mobile setups. Adjustable brightness and colour temperature settings accommodate different ambient conditions.
This minimalist approach supports quick setup and teardown, ideal for vloggers, streamers, and educators on the move.
Professional Studio Setups
High-end setups focus on durable materials and advanced lighting. Seamless green vinyl or muslin backdrops mounted on adjustable rigs prevent wrinkles or creases. Retractable screens allow customisation of green wall size.
Lighting involves multiple LED panels or HMI sources arranged with diffusion filters and flags to eliminate spill and create uniform colour coverage. Control over light temperature and intensity is critical.
Cameras here include full-frame or cinema cameras capable of 4K or higher resolution. Paired with teleprompters and professional-grade lenses, they support precision keying and consistent image quality.
Accessories like chroma key software, green screen calibration charts, and dedicated colour grading monitors refine results for commercial production standards.
Optimising Lighting for Chroma Keying
Proper lighting ensures clean keying and a natural final image. It involves arranging lights to evenly illuminate the green screen and subject while minimising unwanted shadows and colour reflections.
Lighting Placement Techniques
Position two broad, soft lights aimed directly at the green screen to eliminate uneven lighting. These should be placed at about 45 degrees on either side of the screen, roughly 5 to 7 feet away, depending on screen size. This reduces hot spots and shadows.
For the subject, use a three-point lighting setup: key light, fill light, and backlight. Place the key light at a 45-degree angle in front of the subject, a softer fill light on the opposite side, and a backlight behind to separate the subject from the background. This setup helps maintain depth while keeping the green screen evenly lit.
Avoiding Shadows and Colour Spill
Keep the subject at least 3 to 5 feet from the green screen to prevent shadows. Shadows can cause uneven keying and require additional post-processing.
Use flags or grids on lights to control spill, directing light so it does not hit the subject from the green screen angle. Monitor for green reflections on the subject’s edges, especially on shiny or reflective surfaces. Adjusting light intensity and angle often reduces spill effectively.
Software for Green Screen Editing
Effective green screen editing depends on selecting the right software and ensuring compatibility with your preferred video editing platform. Key features include accurate chroma keying, ease of use, and support for various file formats.
Popular Chroma Key Software
Adobe After Effects is widely used for professional green screen editing due to its advanced keying tools like Keylight, which provides precise background removal. DaVinci Resolve also offers strong chroma key functions within its Fusion page, favoured for colour grading integration.
For beginners, software like Movavi Video Editor and Filmora provides simpler interfaces with effective green screen features. OBS Studio is a free option that offers live chroma keying, useful for streamers and content creators who need real-time background replacement.
Compatibility With Editing Platforms
Most green screen software integrates smoothly with major platforms like Adobe Premiere Pro, Final Cut Pro, and DaVinci Resolve. Adobe After Effects works within the Adobe ecosystem, enabling seamless workflow between apps.
Blackmagic Design’s Fusion is embedded in DaVinci Resolve, minimising the need for additional software in post-production. For Mac users, Final Cut Pro includes its own built-in keyer, avoiding third-party software.
When choosing software, check if it supports your camera’s video format (e.g., MOV, MP4) and if it can export in high resolution for editing. Compatibility with your operating system (Windows, macOS, Linux) is also essential for smooth performance.
Practical Setup Tips and Best Practices
Efficient use of space and proper care of your green screen are essential for consistent, high-quality results. Attention to lighting, fabric condition, and positioning can make a significant difference in your final footage.
Setting Up in Small Spaces
When working with limited space, prioritise a green screen material that can be easily folded or rolled, such as wrinkle-resistant fabric or collapsible screens. Position the screen at least 3-5 feet behind the subject to minimise shadow casting.
Use compact, adjustable lighting solutions like LED panels to evenly light the screen without overpowering the space. Avoid harsh directional lights that create unwanted shadows.
Keep the camera angle tight to limit the background visible beyond the green screen edges. Consider mounting your webcam or camera on a tripod that can fit in smaller areas to maintain stability.
Backdrop Maintenance and Care
Regularly check the green screen for wrinkles, stains, or fading, as these imperfections cause uneven chroma keying. Use a steamer to remove wrinkles without damaging fabric, avoiding harsh ironing.
Store your backdrop rolled or folded with minimal pressure to maintain fabric integrity. Clean synthetic materials gently with mild detergent and water if stains occur, and always allow complete drying before use.
Avoid exposure to direct sunlight when not in use, as prolonged UV can degrade colours and material strength. Proper maintenance extends the life of the screen and ensures consistent keying results.
Troubleshooting Common Green Screen Issues
Addressing physical imperfections and lighting inconsistencies is essential for a clean green screen effect. Proper techniques and tools help eliminate wrinkles, reflections, and uneven lighting, which can cause keying problems.
Handling Wrinkles and Reflections
Wrinkles on your green screen create shadows and uneven colour, making it hard to key out the background cleanly. Use a handheld steamer or an iron on a low setting to smooth out fabric screens carefully without touching the material directly. For collapsible or rigid screens, stretch and secure the surface firmly.
Reflections from shiny or glossy surfaces interfere with the green colour. Avoid reflective clothing or jewellery that picks up screen colours. Matte paint or cloth is preferred over glossy materials to reduce glare. Position your subject to minimise screen reflections in the shot.
Dealing With Uneven Lighting
Uneven lighting casts shadows and creates colour variations on the screen, complicating removal in post-processing. Use soft, diffused lights placed evenly on both sides of the screen to maintain consistent illumination. LED panels or softboxes work well.
Distance your subject at least 3 to 6 feet from the green screen to avoid casting shadows. Adjust light intensity separately for the screen and the subject to prevent colour spill. Checking your lighting setup through the camera’s preview helps identify and correct dark spots or bright washes.
Advanced Techniques for Professional Results
Achieving a polished green screen effect requires more than just a solid backdrop and lighting. Incorporating layered environments and interactive elements can significantly boost the production value. Precision in software tools and system setup plays a key role in these enhancements.
Using Virtual Sets
Virtual sets replace physical backgrounds with digitally created environments in real time. They allow creators to craft immersive spaces without additional studio space, saving costs and increasing flexibility. Key software options include Unreal Engine and vMix, which provide customisable scenes and dynamic camera tracking.
Good lighting synchronisation between talent and virtual environment is critical. Shadows must align convincingly to avoid breaking immersion. Using chroma key hardware like Blackmagic ATEM Mini ensures smooth live compositing.
Layered camera angles can enhance depth using virtual sets. Multiple cameras feed into software that adjusts perspectives seamlessly. This setup is especially useful for interviews, talk shows, and game streaming to enrich viewer engagement.
3D and AR Integration
3D and augmented reality add interactive elements to green screen setups, turning static scenes into dynamic experiences. Creators can embed 3D models or animations that respond to movement, using platforms like Adobe Aero or Unity.
Real-time tracking technologies, such as motion capture suits or depth sensors, sync the talent’s movement with AR objects. This integration demands high-performance computing to minimise latency and maintain smooth visuals.
Augmented elements enhance storytelling by enabling on-screen interaction. For example, a presenter can appear to manipulate virtual objects, making the content more engaging and visually informative. Proper calibration of the green screen and hardware is essential to maintain realistic interaction.
Conclusion
A good green screen setup depends on your specific needs and budget. Basic kits work well for beginners, while advanced setups offer better lighting and fabric quality.
When selecting a green screen, consider factors such as size, material, and ease of setup. Proper lighting and a good camera significantly improve the final result.
Key components for a strong setup:
- Seamless green fabric or portable collapsible screens
- Even adjustable lighting sources
- A camera capable of good colour accuracy and resolution
Investing in high-quality accessories pays off in cleaner keying and fewer post-production challenges. Remember to keep the background smooth and evenly lit for the best performance.
Adjust setups based on space constraints and the type of content created. Whether streaming, filming, or photography, the right green screen enhances visual output with minimal effort.